🚀 分割一切模型(SAM) - ViT 巨型(ViT - H)版本
分割一切模型(SAM)能够根据点或框等输入提示生成高质量的对象掩码,还可用于为图像中的所有对象生成掩码。它在包含 1100 万张图像和 11 亿个掩码的数据集上进行训练,在各种分割任务中具有出色的零样本性能。
🚀 快速开始
模型概览
原始仓库链接
该论文的摘要指出:
我们推出了分割一切(SA)项目:一个用于图像分割的新任务、模型和数据集。通过在数据收集循环中使用高效模型,我们构建了迄今为止最大的分割数据集(远超以往),在 1100 万张有许可且尊重隐私的图像上拥有超过 11 亿个掩码。该模型的设计和训练具有可提示性,因此它可以零样本迁移到新的图像分布和任务。我们在众多任务上评估了其能力,发现其零样本性能令人印象深刻 —— 通常与之前的全监督结果相媲美,甚至更优。我们在 https://segment-anything.com 上发布了分割一切模型(SAM)以及包含 11 亿个掩码和 1100 万张图像的相应数据集(SA - 1B),以促进计算机视觉基础模型的研究。
免责声明:此模型卡片的内容由 Hugging Face 团队编写,部分内容从原始 SAM 模型卡片 复制粘贴而来。
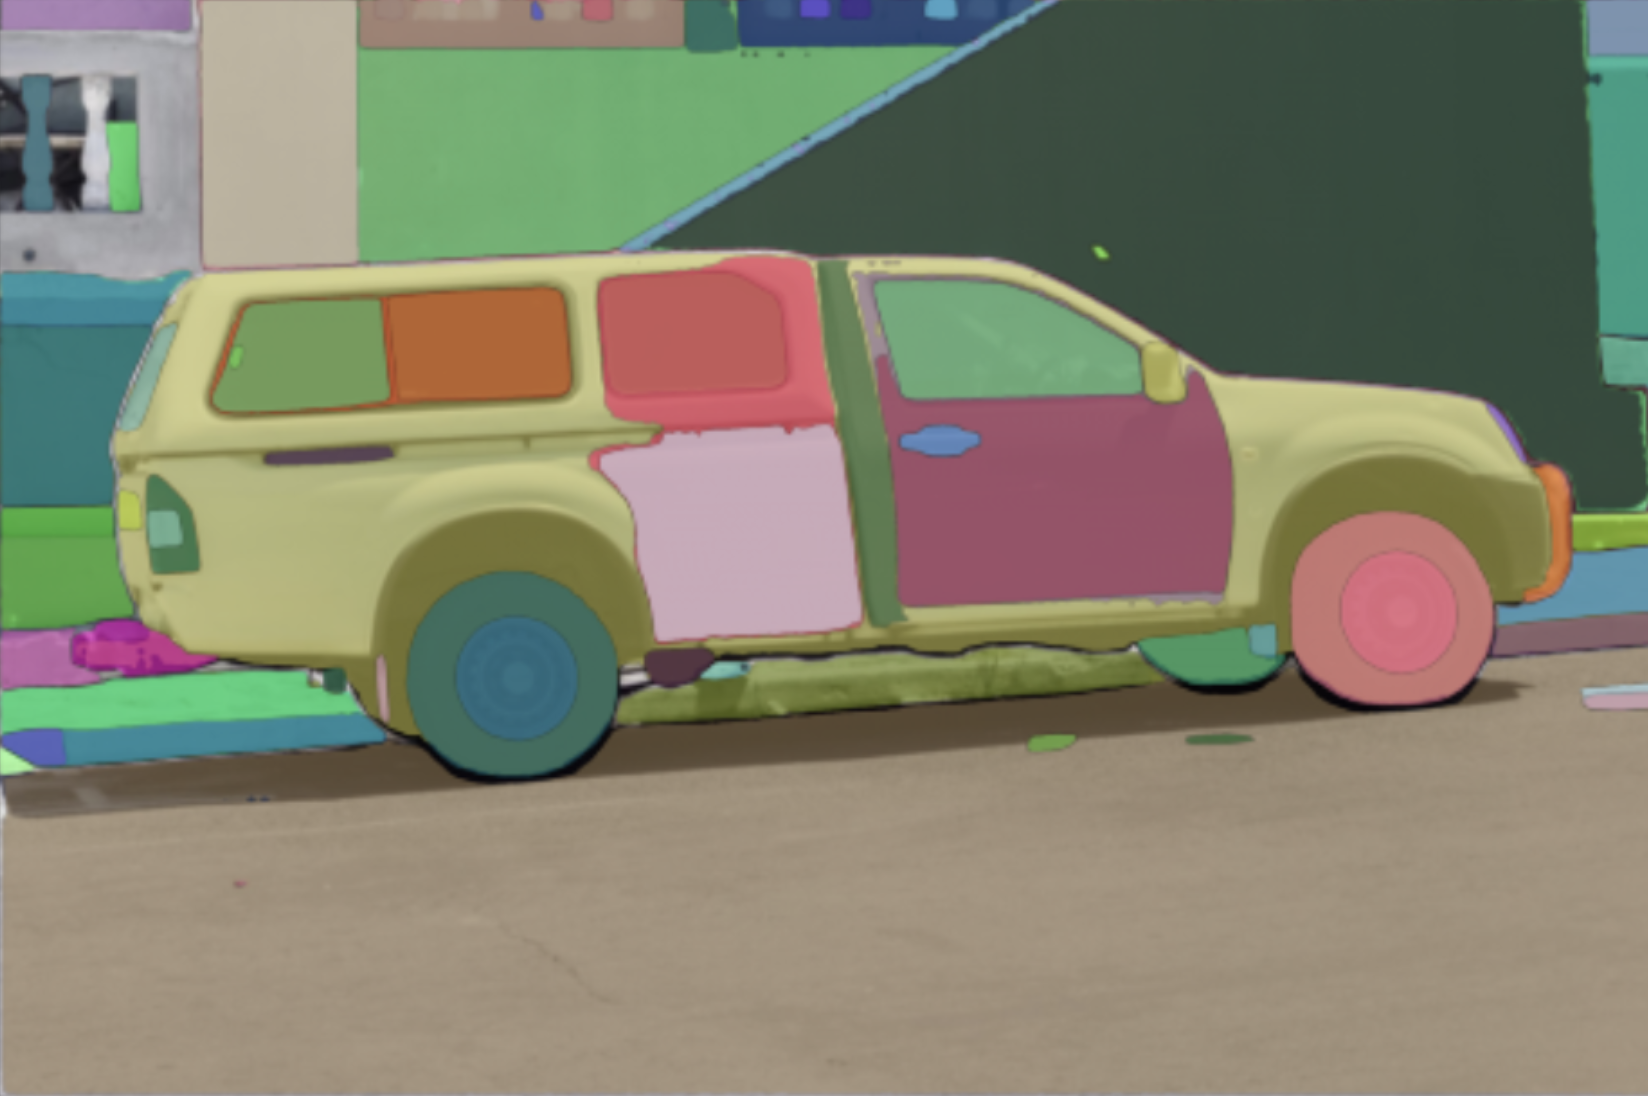
模型架构
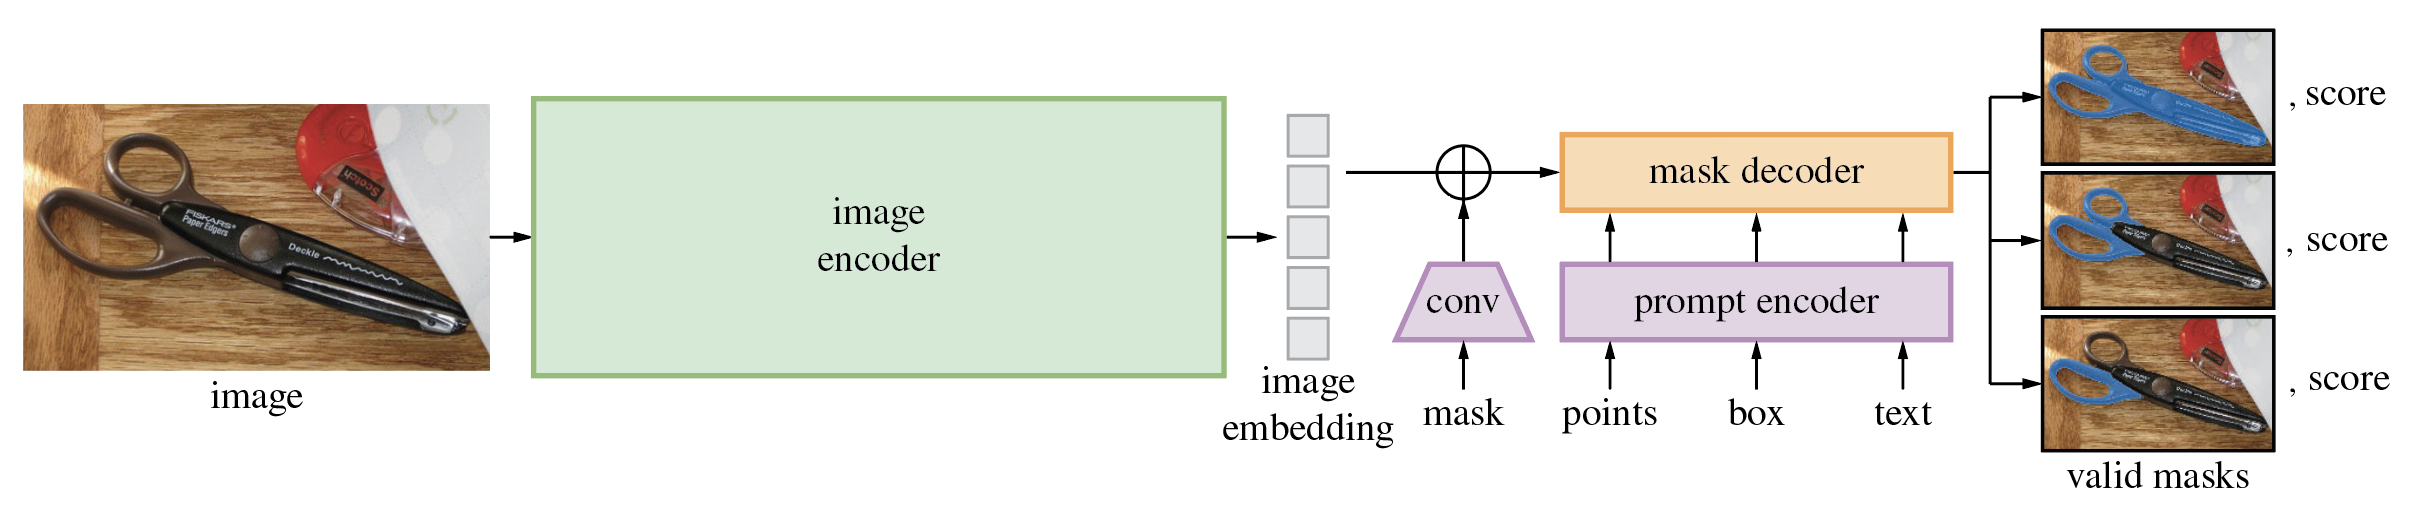 分割一切模型(SAM)的详细架构。
SAM 模型由 3 个模块组成:
VisionEncoder:一个基于 VIT 的图像编码器。它使用注意力机制对图像块进行计算,以得到图像嵌入,并使用了相对位置嵌入。PromptEncoder:为点和边界框生成嵌入。MaskDecoder:一个双向变压器,在图像嵌入和点嵌入之间进行交叉注意力计算(->),并在点嵌入和图像嵌入之间进行交叉注意力计算。输出结果会被进一步处理。Neck:根据 MaskDecoder 生成的上下文掩码预测输出掩码。
💻 使用示例
基础用法 - 提示掩码生成
from PIL import Image
import requests
from transformers import SamModel, SamProcessor
model = SamModel.from_pretrained("facebook/sam-vit-huge")
processor = SamProcessor.from_pretrained("facebook/sam-vit-huge")
img_url = "https://huggingface.co/ybelkada/segment-anything/resolve/main/assets/car.png"
raw_image = Image.open(requests.get(img_url, stream=True).raw).convert("RGB")
input_points = [[[450, 600]]]
inputs = processor(raw_image, input_points=input_points, return_tensors="pt").to("cuda")
outputs = model(**inputs)
masks = processor.image_processor.post_process_masks(outputs.pred_masks.cpu(), inputs["original_sizes"].cpu(), inputs["reshaped_input_sizes"].cpu())
scores = outputs.iou_scores
在生成掩码的其他参数中,你可以传入感兴趣对象的大致 2D 位置、包裹感兴趣对象的边界框(格式应为边界框右上角和左下角的 x、y 坐标)、分割掩码。在撰写本文时,根据 官方仓库,官方模型不支持将文本作为输入。
更多详细信息,请参考这个笔记本,它通过可视化示例展示了如何使用该模型!
高级用法 - 自动掩码生成
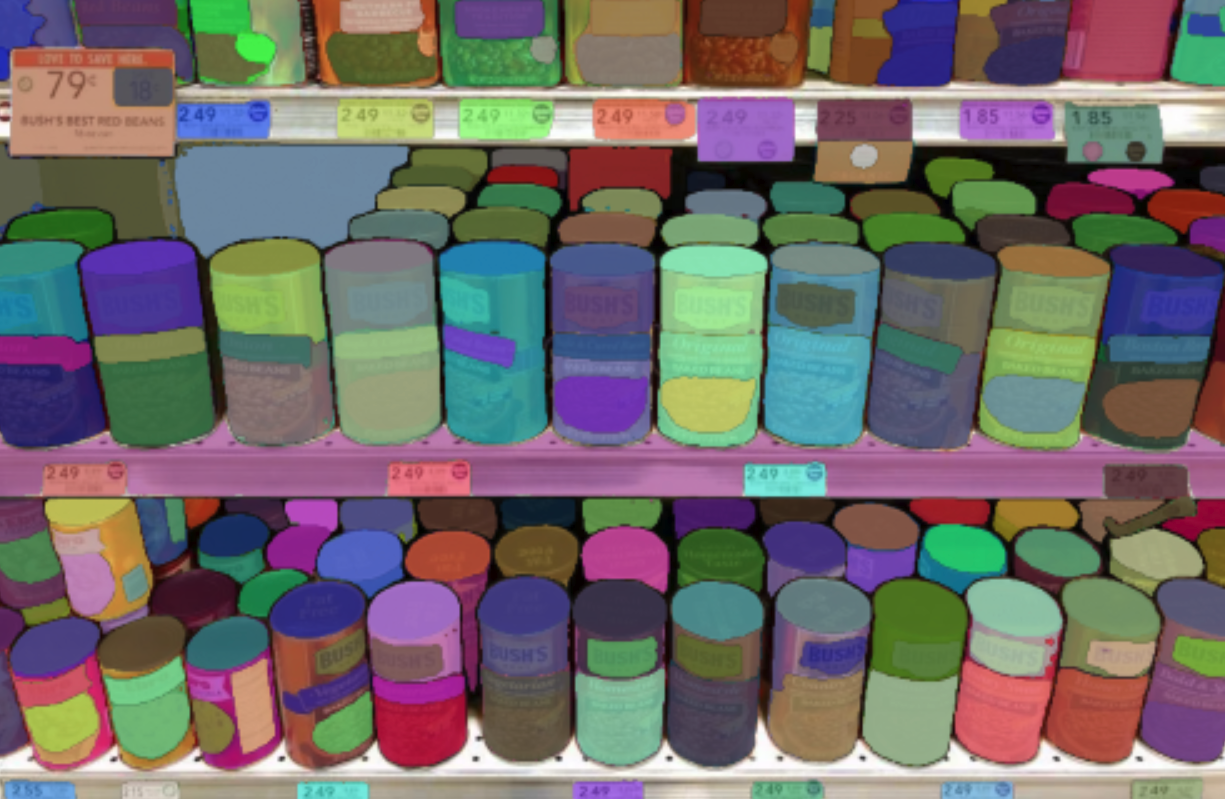
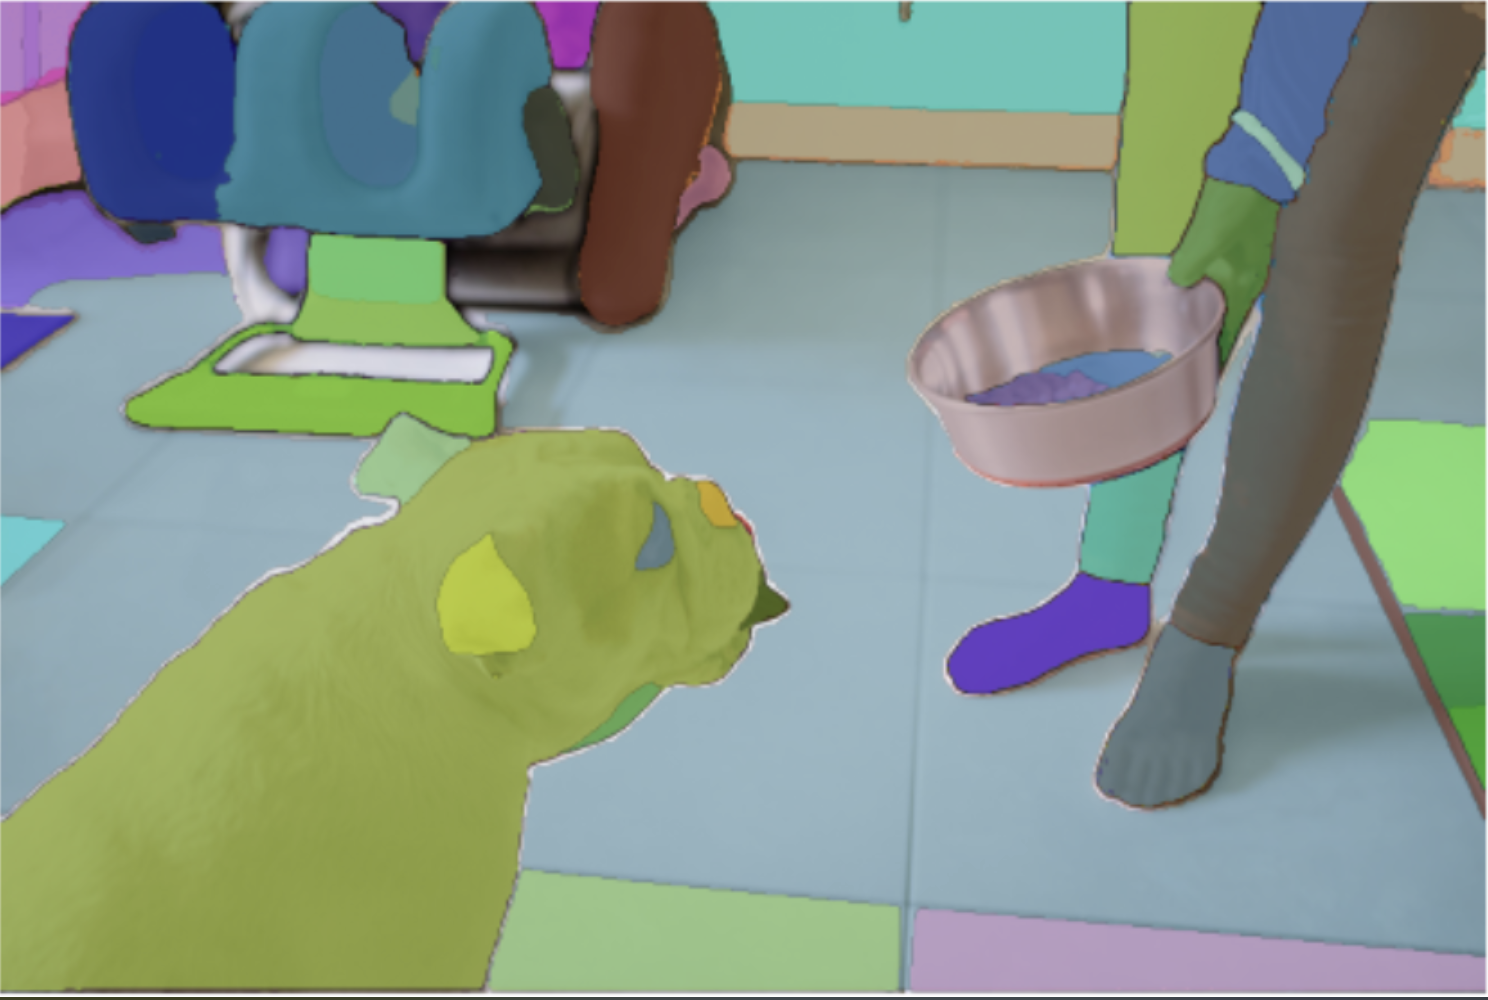
该模型可用于以“零样本”方式为输入图像生成分割掩码。模型会自动使用一个包含 1024 个点的网格进行提示,并将这些点全部输入到模型中。
以下是自动掩码生成的管道示例,展示了如何轻松运行它(可在任何设备上运行!只需传入适当的 points_per_batch 参数):
from transformers import pipeline
generator =  pipeline("mask-generation", device = 0, points_per_batch = 256)
image_url = "https://huggingface.co/ybelkada/segment-anything/resolve/main/assets/car.png"
outputs = generator(image_url, points_per_batch = 256)
现在来显示图像:
import matplotlib.pyplot as plt
from PIL import Image
import numpy as np

def show_mask(mask, ax, random_color=False):
    if random_color:
        color = np.concatenate([np.random.random(3), np.array([0.6])], axis=0)
    else:
        color = np.array([30 / 255, 144 / 255, 255 / 255, 0.6])
    h, w = mask.shape[-2:]
    mask_image = mask.reshape(h, w, 1) * color.reshape(1, 1, -1)
    ax.imshow(mask_image)


plt.imshow(np.array(raw_image))
ax = plt.gca()
for mask in outputs["masks"]:
    show_mask(mask, ax=ax, random_color=True)
plt.axis("off")
plt.show()
这应该会得到如下结果: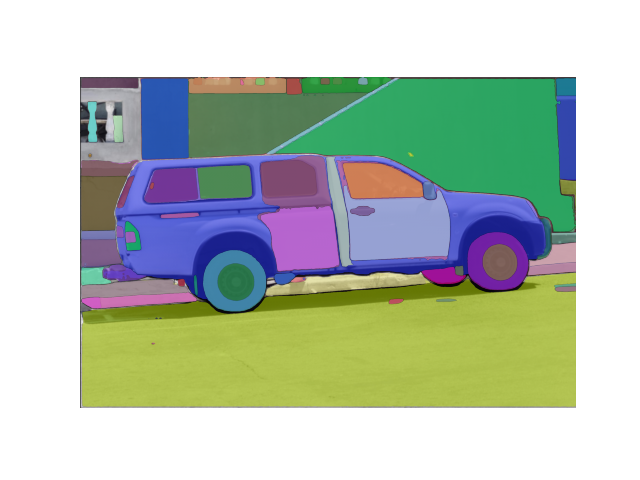
📄 许可证
本项目采用 Apache - 2.0 许可证。
📚 引用
如果您使用此模型,请使用以下 BibTeX 条目进行引用。
@article{kirillov2023segany,
  title={Segment Anything},
  author={Kirillov, Alexander and Mintun, Eric and Ravi, Nikhila and Mao, Hanzi and Rolland, Chloe and Gustafson, Laura and Xiao, Tete and Whitehead, Spencer and Berg, Alexander C. and Lo, Wan-Yen and Doll{\'a}r, Piotr and Girshick, Ross},
  journal={arXiv:2304.02643},
  year={2023}
}
 Transformers 支持多种语言
%20--%3e%3cdefs%3e%3cstyle%3e%20.st0%20{%20fill:%20%23061b40;%20}%20.st1%20{%20fill:%20%23306af1;%20}%20.st2%20{%20fill:%20%235ce5cf;%20}%20%3c/style%3e%3c/defs%3e%3cg%3e%3cpath%20class='st0'%20d='M55,10.5h9v3h-9v9h12V7.5h-12v3ZM64,19.5h-6v-3h6v3Z'/%3e%3cpolygon%20class='st0'%20points='69%2016.5%2078%2016.5%2078%2019.5%2069%2019.5%2069%2022.5%2081%2022.5%2081%2013.5%2072%2013.5%2072%2010.5%2081%2010.5%2081%207.5%2069%207.5%2069%2016.5'/%3e%3cpolygon%20class='st0'%20points='95%2010.5%2095%207.5%2083%207.5%2083%2022.5%2095%2022.5%2095%2019.5%2086%2019.5%2086%2016.5%2095%2016.5%2095%2013.5%2086%2013.5%2086%2010.5%2095%2010.5'/%3e%3cpath%20class='st0'%20d='M40,1.5v21h11.6l1.4-1.4v-7.6h0c0,0-1.4-1.5-1.4-1.5l1.4-1.4V2.9l-1.4-1.4h-11.6ZM50,19.5h-7v-6h7v6ZM50,10.5h-7v-6h7v6Z'/%3e%3c/g%3e%3cpath%20class='st1'%20d='M23.1,24L14.7,4.8l-4.9,11.2h3.8l-1.8,4H3.3L12.1,0H2C.9,0,0,.9,0,2v20c0,1.1.9,2,2,2h21.1Z'/%3e%3cpath%20class='st2'%20d='M34,0h-16.8l10.6,24h6.2c1.1,0,2-.9,2-2V2C36,.9,35.1,0,34,0ZM32.5,20h-4V4h4v16Z'/%3e%3c/svg%3e)